Customizing The Ribbon In PowerPoint 2010
The ribbon in PowerPoint 2010 is much more flexible, as you can now do the following:
- Create new tabs.
- Create new groups within a tab.
- Add commands to a group.
- Change the order in which tabs appear.
- Change the order in which groups appear on tabs.
Let’s demonstrate how we can customize the ribbon with a little example.
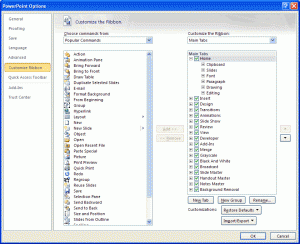
Click the Office Button > PowerPoint > Options > Customize Ribbon. The panel on the right displays what tabs you can currently see in the ribbon, what groups exist in each tab, and also what commands are in each group. The panel on the left lists commands and macros that you can add.

Create A New Tab On The Ribbon
To create a new tab on the ribbon, first of all select a tab in the panel on the right. Click New Tab and the new tab will is positioned immediately after the tab you selected. It’s given the default name of “New Tab (Custom) and the default group within it is named New Group (Custom). We can rename both tab and group by selecting them one at a time and clicking Rename. Type in something meaningful for the name of the tab and group.

Creating A New Group In A Tab
To create a new group in a tab, select the tab and click New Group. The new group is given the default name and you can change it using the rename button, as described earlier. If you select a particular group within the tab before creating a new group, the new group is positioned directly after the selected group. This is true of all additions – the new one appears after the selected one.
You’ll notice that tabs and groups have either a ‘+’ button or a ‘-’ button displayed to their left: you can use these buttons to expand and collapse the display of groups or commands within them.
Changing the order in which tabs, groups or commands appear is very easy. One method of doing this involves clicking on what you want to move and dragging it upwards or downwards. A selection bar appears when you do this, and this helps you to determine where the tab, group or command will be dropped when the mouse is released. Another method is to select something and then click the up or down arrows over to the right.
To remove a tab, group or command, select it in the panel on the right and click Remove.
Adding Commands To A Group
To add a command to a group, select the group in the panel on the right, select the command in the panel on the left and then click Add. As you’d expect, adding a command whilst another command is already selected will place the new command after the selected one. In contrast, if you add a command while the group itself is selected, the new command appears at the end.
Above the command list panel is a drop down list that allows you to filter the list by the following categories:
- Popular Commands
- Commands Not in the Ribbon
- All Commands
- Macros
- Office Menu
- All Tabs
- Main Tabs
- Tool Tabs
- Custom Tabs and Groups
Restoring The Ribbon’s Defaults
If you make a mess of your ribbon customization, don’t worry because you can restore the ribbon’s default settings. You do this by clicking the Restore Defaults button at the bottom of the window, and then by selecting either Restore only selected Ribbon tab or Restore all Ribbon tabs and Quick Access Toolbar customizations. These options are fairly self explanatory.
Importing Or Exporting Ribbon Customizations
If you create a ribbon customization that you think may be useful to other people you work with, you can export your settings for them to import. When they import your customizations, their ribbon setup will look the same as yours.
To export your ribbon customizations, click Import/Export at the bottom of the window and then select Export All Ribbon And Quick Access Toolbar Customizations. Find a place on your hard drive or network, type in a name for the customizations file and click Save. The file is given a “.exportedUI” extension.

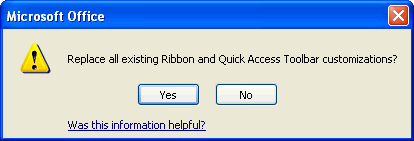
To import a ribbon customization, click the Import/Export button and this time select Import Customization File. Find where the customization file is, select it and click Open. You will then see a confirmation prompt asking you whether you want to replace all existing ribbon and quick access toolbar customizations. Clicking No will cancel without making any changes, whereas clicking Yes will overwrite your existing ribbon configuration with the one saved in the customization file you just imported.

To apply the changes you have made, click OK at the bottom of the PowerPoint Options window.

